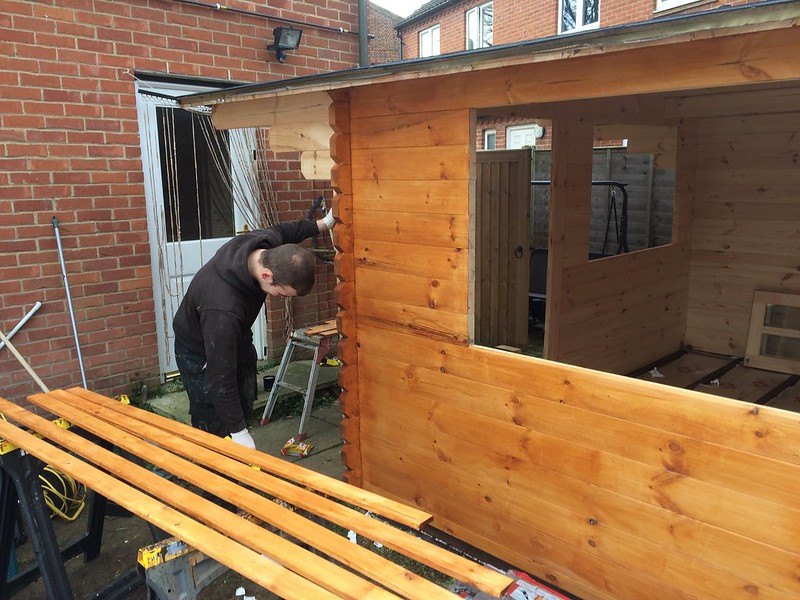
Although Cabins Unlimited offer a painting service, sometimes customers wish to paint their own cabins after installation, so we thought we would write this handy guide to help customers in knowing some key points on painting their building properly to not only meet the manufacturer warranty guidelines but to ensure the longevity of their building is maximised. At this point its is also worth reminding that our summerhouses are made with softwood, slow grown Scandinavian spruce which by the nature of the timber may have some knots and some splitting on its logs. These are all totally normal for the type of timber and of no concern unless the split runs all the way through the depth of the timber and the installation of the building by our team does not include the filling or sanding of the logs and this element is part of the painting/finishing of the summerhouse. If you would like us to quote to paint your summerhouse please enquire with our office on 01362 470075.
Exterior Corner Joints
One of the most important parts to paint properly is the interlocking log joints. Where the corner joints interlock this is often an area which without care is quite difficult to seal properly. Using a small brush it is important that paint goes into the corners so that no untreated wood is shown. The image below shows an example of where the timber around the corner has been painted but the important interlocking part has been missed. This can with a strong wind encourage rain to be pushed into the corner joints and over time will cause the timber to swell and encourage moulds to grow in the timber and will eventually come through to the inside.

So it is essential that enough paint is put into the joints to prevent moisture getting in. As a company we also recommend the use of a hybrid over paintable silicone bead to be applied to the corner log ear joints. This added precaution will also ensure that moisture from a driving wind cannot find its way into the corner joints. The silicone bead is not applied during the installation process but is recommended as part of the customer painting the building.
Facia Boards

As part of the manufacturer's warranty, it is also very important to make sure that any timber that moisture can get to, is treated. The facias of the cabin that edge the roof need to be removed after installation and both sides of the facia need to be treated to protect the timber and lengthen its life. Often we find that customers have not done this and over time will be the first thing to rot and need to be replaced. The same goes for any timber diamonds that are supplied that cover up the facia joints.
Doors & Windows
One of the areas that needs to be painted is behind the door and window trims. Windows and doors in log cabins are constructed to be free floating. This means that the logs walls of the building expand and contract independently of the windows and doors. The logs will expand and contract in the U profile that is created by the windows trims that are fixed to the window frame. This U profile fits around the log on the inside and outside but is not sealed so water can flow behind the profile so it is essential that it is painted on the back and front. Likewise the ends of the logs that are hidden behind the trims of the windows and doors also need to be treated. The only way to do this is to remove the trims from the doors and windows on the outside one by one and paint the ends of the logs. An alternative way to do this is to remove the entire window to gain access to the ends of the logs. The more that a building can be protected the longer it will last and more watertight it will be. We recommend the use of sealant throughout which can be painted over and is purely to ensure that water does not get in your cabin.
Inside Walls
The manufacturers warranty also requires that the inside timber is also treated with a good quality treatment. If you like to see the wood a interior polyurethane is a perfect option. You could also choose any other interior paint. Sadolin Superdec comes in hundreds of colours and we can colour match pretty much any colour for you. Sadolin Superdec is a perfect product for any timber in a cabin inside or out and if you're looking for a solid colour then this is a great option. The key is using a microporous timber treatment that will allow the timber to breath ensuring the moisture content of the timber is maintained to prevent rotting and also splitting. We advise you apply one coat to the ceiling and 2 coats to the walls as a minimum. We often find that whites and cream colours take several coats to cover completely.
Floorboards
The advice regarding treating the floors is again to use a polyurethane floor coating. The number of coats will vary largely to if you are planning on putting a covering on the floor such as carpet, laminate or vinyl. If you are putting an additional floor covering then a single coat will be enough. if you are planning on leaving the tongue and groove floorboards supplied with the cabin as the final floor of the building then 3 coats of the floor treatment is recommended as a minimum. Depending on the amount of use and traffic using the building the coatings will need repeating regularly. Please note that the floorboards are softwood floorboards. The floorboards may need some timber filler and a little sanding to improve any natural imperfections of the softwood timber. This is not part of the installation service.

